The Fighting at Lukuledi Mission:German
East Africa, 19th-21st October 1917
No 1 Column.
In late 1917
the British forces around Kilwa and Lindi were formed into columns, roughly
corresponding to brigades, that were used to try and force Colonel Paul von Lettow-Vorbeck’s
Schutztruppe out of this corner of German East Africa. On 27th September the 1st
Battalion of the 3rd Regiment of the King’s African Rifles (1/3 KAR)
and the 129th Baluchis were ordered to support No 1 Column whose
principal units were the Gold Coast Regiment (GCR), the 2nd
Battalion of the 2nd Regiment of King’s African Rifles (2/2 KAR), and
a section of the 27th Mountain Battery (Indian Army). The 25th
Cavalry (Indian Army) was temporarily attached to No 1 Column but one squadron
was deployed elsewhere with another column. Colonel G.M. Orr, Indian Army, was
the No 1 Column commander and he had marched his men down from the Kilwa area; his
mission was to disrupt enemy withdrawal routes by destroying German food depots
and watering points. In this region good
water holes were few and far between.
After stiff
fighting at Kihende and on the Mbemba road Ruponde was captured on the 10th
October. An important German stores and
workshops depot was seized here. Two
days later Lieutenant Colonel T.O. Fitzgerald, Commanding Officer of 1/3 KAR,
was ordered to Chingwea, 15 miles south of Ruponda, along with a squadron of cavalry. There German buildings were burned and water
storage tanks removed before the British troops returned to Ruponda. The following day 1/3 KAR was sent to seize
Mnero Mission which was then garrisoned by a detachment of the battalion, the
main body again returning to Ruponda.
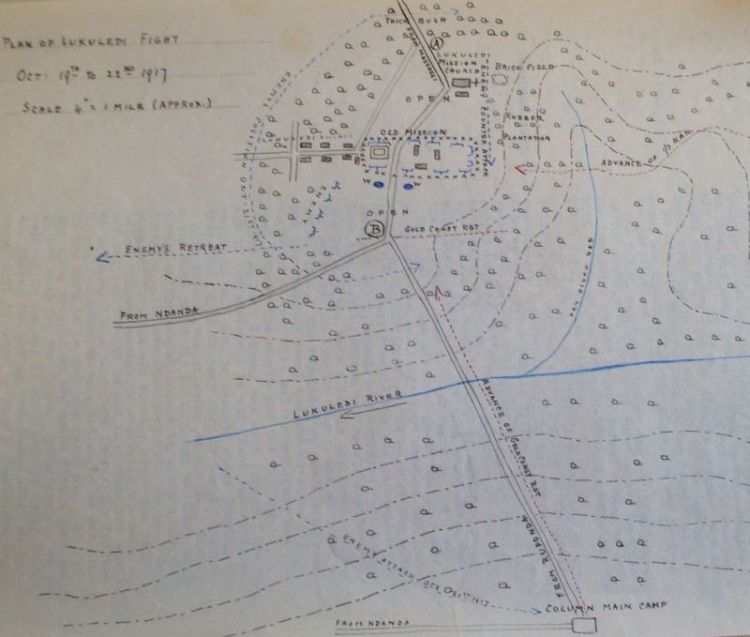
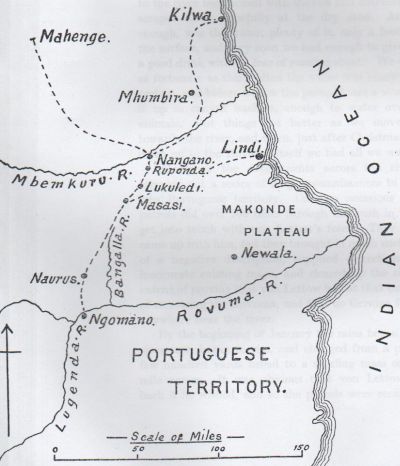
Right: A map which will help you place Lukuledi. For a detailed map of the action please scroll to the bottom
The approach to Lukuledi Mission.
On 18th
September No 1 Column advanced to seize Lukuledi Mission which lay on the Lukuledi River south of Chingwea. The column commander’s plan envisaged a
direct move southwards down the road by the GCR whilst 1/3KAR deployed through
the bush to simultaneously engage the enemy from the west and the rear. In the event the local guides took 1/3KAR too
far into the bush which left the GCR to fight the encounter battle unsupported
by other infantry.
“B” Company of
the GCR, nearly 160 men strong, advanced to contact down the road accompanied
by two Rolls Royce armoured cars of the 7th Light Armoured Car
Battery. Captain E.B. Methven MC,
commanding “B” Company GCR, encountered a local boy who advised him that many
German troops were at the Mission but it looked as if they were packing up to
move.
On reaching the Lukuledi River
“B” Company’s leading platoon under Lieutenant Richard Cheetham Woods advanced
up the exposed forward slope below the Mission
but could not see any signs of movement.
Captain Methven
now advanced his company in line, with his machine gun on the road which acted
as the axis of advance, up the hill towards the Mission.
The vegetation on this ground had been burned down and the Gold Coasters
were all in plain sight of the Mission
compounds; they had entered the German killing ground. Three enemy companies concealed around the Mission opened a sudden
and devastating volume of rifle fire onto “B” Company, knocking several Gold
Coasters down immediately. The remainder
of “B” Company struggled to find bullet-proof cover on the exposed slope whilst
several of the dead and wounded who could not move received repeat hits from
German bullets.
Captain Methven
ordered his machine gun to return fire into the Mission
compounds but the enemy fire was so accurate that Colour Sergeant Michael Cunneen
who was firing the gun was immediately killed.
Sergeant Major Mama Juma who took his place was hit, as was the
remainder of the gun team. As the platoons
of “B” Company struggled to return fire Lieutenant Woods was killed, his place
being taken by Sergeant Yessufu Mamprusi.
Captain Methven received three wounds in a leg that had earlier taken a
wound during fighting in France. Another “B” Company officer, Lieutenant R.A. Baillie,
was shot in both legs but pulled himself into a clump of grass. One armoured car had broken down but the
other, contrary to orders, advanced into the firing line where its tyres were
immediately shredded. The car’s gunner
could not locate the well-concealed enemy and so the vehicle’s machine gun could
not influence the battle.
Above: German Askari in action
The Gold Coast
Pioneer Company was now sent forward to assist “B” Company which had lost over
a third of its numbers as casualties. After conferring both company commanders
agreed that there was little that the Pioneers could effectively do without
sustaining heavy casualties themselves.
“B” Company could not withdraw without taking huge losses so Captain
Methven’s men just had to endure their ordeal until darkness disrupted the
German marksmanship. The Pioneers sent
forward Lieutenant Robert de Bedick Saunderson to take over command from
Sergeant Mamprusi and the Lieutenant led
a spirited charge against an enemy position, but he and several of his men were
shot and killed before they penetrated their objective. Sergeant Mamprusi, who received three wounds
during the day’s fighting, again took charge and withdrew the survivors back to
their fire positions.
Right: A German Askari
The mountain
guns of the 27th Mountain Battery now came into action and shelled
likely enemy positions. The gunner
Forward Observation Officer, Lieutenant Foster, came forward to Captain Methven
and heard of Lieutenant Baillies’ situation.
Despite the continuing very effective enemy fire Lieutenant Foster ran
forward to recover Lieutenant Baillie and carry him to the aid post in the
rear. Whilst the unit Medical Officer, Captain
H.W. Gush, was dressing Lieutenant Baillie’s wounds, Captain Gush himself was
shot through the arm. Lieutenant Foster
later received a Military Cross for his act of gallantry.
The second
armoured car now repaired itself and joined the first one whilst the remainder
of the GCR occupied positions on the north bank of the river and fired at enemy
targets when they could be located.
Meanwhile 1/3KAR could hear the sounds of the battle but the main body
of the battalion was too deep into the bush on the west flank to immediately
intervene. The leading elements of
1/3KAR did manage to enter the Mission
compounds but had to withdraw as the Indian mountain gunners, unaware of the
KAR’s presence, shelled the platoon position. In the late afternoon the Germans mounted an
unsuccessful counter attack against the GCR west flank that was broken up by
the fire of the 1/3KAR forward platoons.
After last
light “B” Company GCR extricated itself and withdrew to the column camp that
had been entrenched and prepared by 2/2KAR.
“B” Company GCR had lost 15 men
killed and 35 men wounded. Captain
Methven later received a Bar to the Military Cross that he had previously been
awarded for service on the Western Front.
4188 Sergeant Jessufu
Mamprusi, Gold Coast Regiment, who had been awarded a Military Medal on the 1st
September 1917, received a Distinguished Conduct Medal with the citation:
“On October 18th (1917) at Lukuledi
missiondisplayed
conspicuous gallantry and devotion to duty.
Although his officer was killed and he himself wounded, he remained with
and directed his men, whilst doing so he was wounded twice more.”
5860 Acting
Corporal Issaka Dagarti, Gold Coast Regiment, also received a Distinguished
Conduct Medal with the citation:
“On 18th October 1917 at Lukuledi
Mission. For conspicuous bravery and
devotion to duty, having been once wounded, he had his wound dressed and
returned to the firing line and assisted to bring in a machine gun whose crew
had become casualties and which was lying in a very exposed position.”
The defence of Lukuledi Mission.
1/3KAR had
dug-in where it was for the night. At
first light patrols went into the Mission
compounds and ascertained that the enemy had used the cover of darkness to
withdraw eastwards down the Ndanda track.
Major Kraut, the German commander, wished to closely protect food depots
in the area. 1/3KAR occupied the
compounds and vigorously patrolled the local area, dispersing small groups of
enemy. The column commander now decided
to concentrate all the Stokes Mortars in the column and, despite strong
protests from Lieutenant Colonel Fitzgerald, 1/3KAR had its mortar taken
away. In the evening orders were issued
that the next day 1/3KAR would support the cavalry in a raid on Massasi whilst
the remainder of the column moved down the track towards Ndanda.
At 0530 hours
on 21st October the cavalry was leading 1/3KAR southwards out of
Lukuledi when enemy machine gun fire was opened from the Massasi track. The cavalry took cover in the new church and
brickyards to the west whilst 1/3KAR re-occupied its positions around the
mission building and the Lukuledi Boma, where the water points were. By 0545 hours the enemy was pouring fire into
the British positions from the south. Colonel
von Lettow-Vorbeck was himself leading this assault and using six Schutztruppe
companies in an attempt to re-take Lukuledi.
Lieutenant Colonel
Fitzgerald sent out a half-company to outflank the enemy but this manoeuvre was
beaten back by a complete enemy company.
During this encounter African officer Adam el Hashim Effendi avoided
capture by shooting three German whites with his revolver. Communications with column headquarters had
been cut and three messengers who were dispatched by 1/3KAR were all killed or
wounded. Colonel Orr was not aware of
the fighting around the mission.
At 0745 hours
the enemy brought up two quick-firing guns and shelled 1/3KAR’s position. Without his Stokes Mortar Lieutenant Colonel
Fitzgerald could not reply to the fire of the enemy artillery. As the Schutztruppe gradually encircled the
boma a terrific fire was concentrated upon the British defenders. Despite this the KAR porters constantly
re-supplied ammunition to the companies and the KAR stretcher bearers continued
to bring in the dead and wounded to the Aid Post in the centre of the boma. Here
the newly-joined battalion Medical Officer, Captain Murphy, dealt with the
wounded single-handedly. Six porters
were killed and 27 were wounded. Major J.H.
de la Pasture was shot through the chest and severely wounded. Also wounded
were Captain W.G. Edwards, Captain K. Findlay, Lieutenant A.H. Hutchinson
(attached from 3/3KAR) and Adam El Hashim Effendi. Lieutenant Arthur John Forbes was shot in the
head and killed. Sergeant James
Robertson Horsburgh was badly wounded; he died of his wounds three days later.
Left: A fine looking warrior, an Askari of the KAR
On the eastern
side of the boma a KAR machine gun was disabled. The African NCO in charge of the gun withdrew
it to cover to mend it. On seeing this
several KAR Askari retired thinking that a withdrawal had been ordered. Captain Edwards, the local commander,
immediately and decisively rallied these men and positioned them back in their
perimeter trenches. For his gallantry
Captain Edwards was later awarded a Military Cross.
At around 0930
hours a messenger got through to Column Headquarters and Colonel Orr deployed
the 129th Baluchis south of the river to prevent the enemy from
cutting off 1/3KAR. The British
artillery now opened fire and began to force the Germans away from the 1/3KAR
position. However an enemy group under
Major Kraut was active to the north in the column rear area where it attacked
the cavalry camp. Several Sepoys and Followers and all the tethered animals
were killed and the regimental baggage captured. The 25th Cavalry Transport
Officer, Captain N.J.M. Barry, was also killed.
Captain Barry was a settler from Naivasha in British
East Africa and he had originally joined the East African Mounted
Rifles.
By 1130 hours
the enemy was withdrawing but before departing he fired six shells into the
roof of the new church. This beautiful
building was nearing completion after seven years construction work, but now it
burned down in a couple of hours. At
1700 hours the Germans returned and made a faint-hearted attack on the boma,
but now 1/3KAR had got its Stokes Mortar back and this weapon was used to break up the enemy assault. The battle was over, and it was one of the
toughest fights that 1/3KAR participated in during the war. As well as the officer and porter casualties
already listed, the battalion lost 11 rank and file killed and 36 wounded. Two German machine guns were captured by
1/3KAR, one of them being surrounded by its dead crew. After the war these bullet-scarred weapons
were displayed in the regimental lines in Nairobi. German casualty figures are not known but
were not light; three German company commanders and a European sergeant major
were killed during the fighting against 3/1KAR.
Colour Quarter
Master Sergeant Hamis Bin Juma, 1/3KAR, received a Bar to his Distinguished
Conduct Medal for:
“This NCO throughout the whole action showed
considerable gallantry in bringing forward ammunition, repeatedly going
backwards and forwards to the Boma over exposed ground under very heavy MG and
rifle fire. His cool and gallant conduct
deserves the highest praise.”
4958 Sergeant
Masood Bin Zabir, 1/3KAR, received a Distinguished Conduct Medal for:
“This sergeant was in command of a machine gun
which was subjected to the most intense rifle, machine gun and big gun fire,
but he continued to serve his gun with great devotion to duty until it was
eventually put out of action by a direct hit.
He then continued to fire with a rifle that he picked up from a dead man
beside him. He has always displayed the
most gallant conduct and set an example of the highest order to his men.”
The British
dead were initially buried in the Lukuledi Mission grave yard; after the war
they were re-buried in Dar Es
Salaam War Cemetery. On 23rd October No 1 Column
returned to Ruponda. Higher authority
had decided that it was impossible to re-supply the column if it remained at
Lukuledi as all stores had to be portered from Kilwa, the Lindi re-supply line
not yet being open. The Germans were now
free to re-occupy their old mission station.
Above: A map of the Lukuledi Fight
SOURCES:
3KAR Great War Record. The King’s African Rifles By Lieutenant Colonel H. Moyse-Bartlett.
The Gold Coast Regiment in the East African
Campaign by Sir Hugh
Clifford KCMG.
The History of the Royal West African Frontier
Force by Heywood and
Clarke.
My Reminiscences of East Africa by General von Lettow-Vorbeck.
Cavalry in Bush Warfare (article) by Captain W.K. Fraser-Tytler
MC.
Operations on Interior Lines in Bush Warfare (Journal of the Royal United Services
Institution article) by Colonel G.M. Orr CBE DSO.
From Rumbo to the Rovuma
(Army Quarterly
article) by Colonel G.M. Orr CBE DSO.
The African Distinguished Conduct Medal compiled by John Arnold.

 After stiff
fighting at Kihende and on the Mbemba road Ruponde was captured on the 10th
October. An important German stores and
workshops depot was seized here. Two
days later Lieutenant Colonel T.O. Fitzgerald, Commanding Officer of 1/3 KAR,
was ordered to Chingwea, 15 miles south of Ruponda, along with a squadron of cavalry. There German buildings were burned and water
storage tanks removed before the British troops returned to Ruponda. The following day 1/3 KAR was sent to seize
Mnero Mission which was then garrisoned by a detachment of the battalion, the
main body again returning to Ruponda.
After stiff
fighting at Kihende and on the Mbemba road Ruponde was captured on the 10th
October. An important German stores and
workshops depot was seized here. Two
days later Lieutenant Colonel T.O. Fitzgerald, Commanding Officer of 1/3 KAR,
was ordered to Chingwea, 15 miles south of Ruponda, along with a squadron of cavalry. There German buildings were burned and water
storage tanks removed before the British troops returned to Ruponda. The following day 1/3 KAR was sent to seize
Mnero Mission which was then garrisoned by a detachment of the battalion, the
main body again returning to Ruponda. 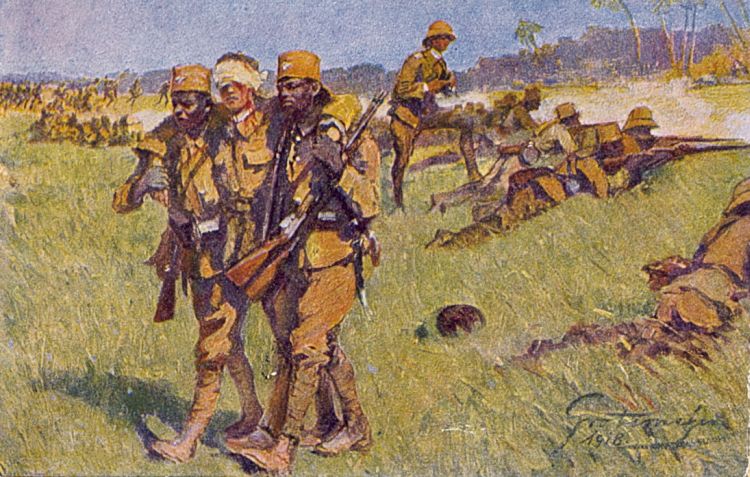
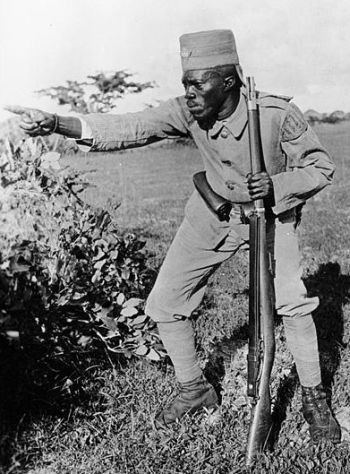 Right: A German Askari
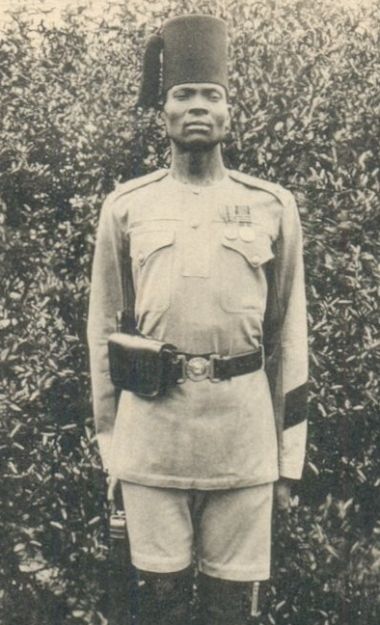 Left: A fine looking warrior, an Askari of the KAR