When Italy declared war on Britain on 10th
June 1940 the Northern Frontier District and the northern coast of Kenya were
threatened by enemy troops from Abyssinia and Somalia. 2nd (East Africa) Infantry Brigade under
Brigadier C.C. Fowkes was responsible for the defence of the inland sector of
Kenya and the KAR battalions in the Brigade were 1 KAR (Nyasaland), 5 KAR
(Kenya) and 1st/6th KAR (Tanganyika).
The British defence plan was loosely based on “Resist invasion but do
not get yourself wiped out” and the battalions were soon in action.
On the 10th June ‘B’ Company 1
KAR (Captain R.D. Blackie, Sherwood Foresters) was located at Moyale and
Blackie immediately sent reconnaissance patrols across the border to identify
enemy positions. The Italians responded
with mortar fire and on the 12th June enemy planes bombed the
British fort, wounding Private George – the first British casualty in the
theatre. From Wajir on 13th
June a company of 5 KAR under Captain R.A.F. Hurt (Royal Welch Fusiliers)
raided the Italian post at Dif to the south-east; three Italian Banda irregular
troops were wounded and captured but enemy planes responded by bombing Wajir,
killing four Askari of ‘C’ Company 5 KAR, wounding 18 others and setting the
fuel dump alight.
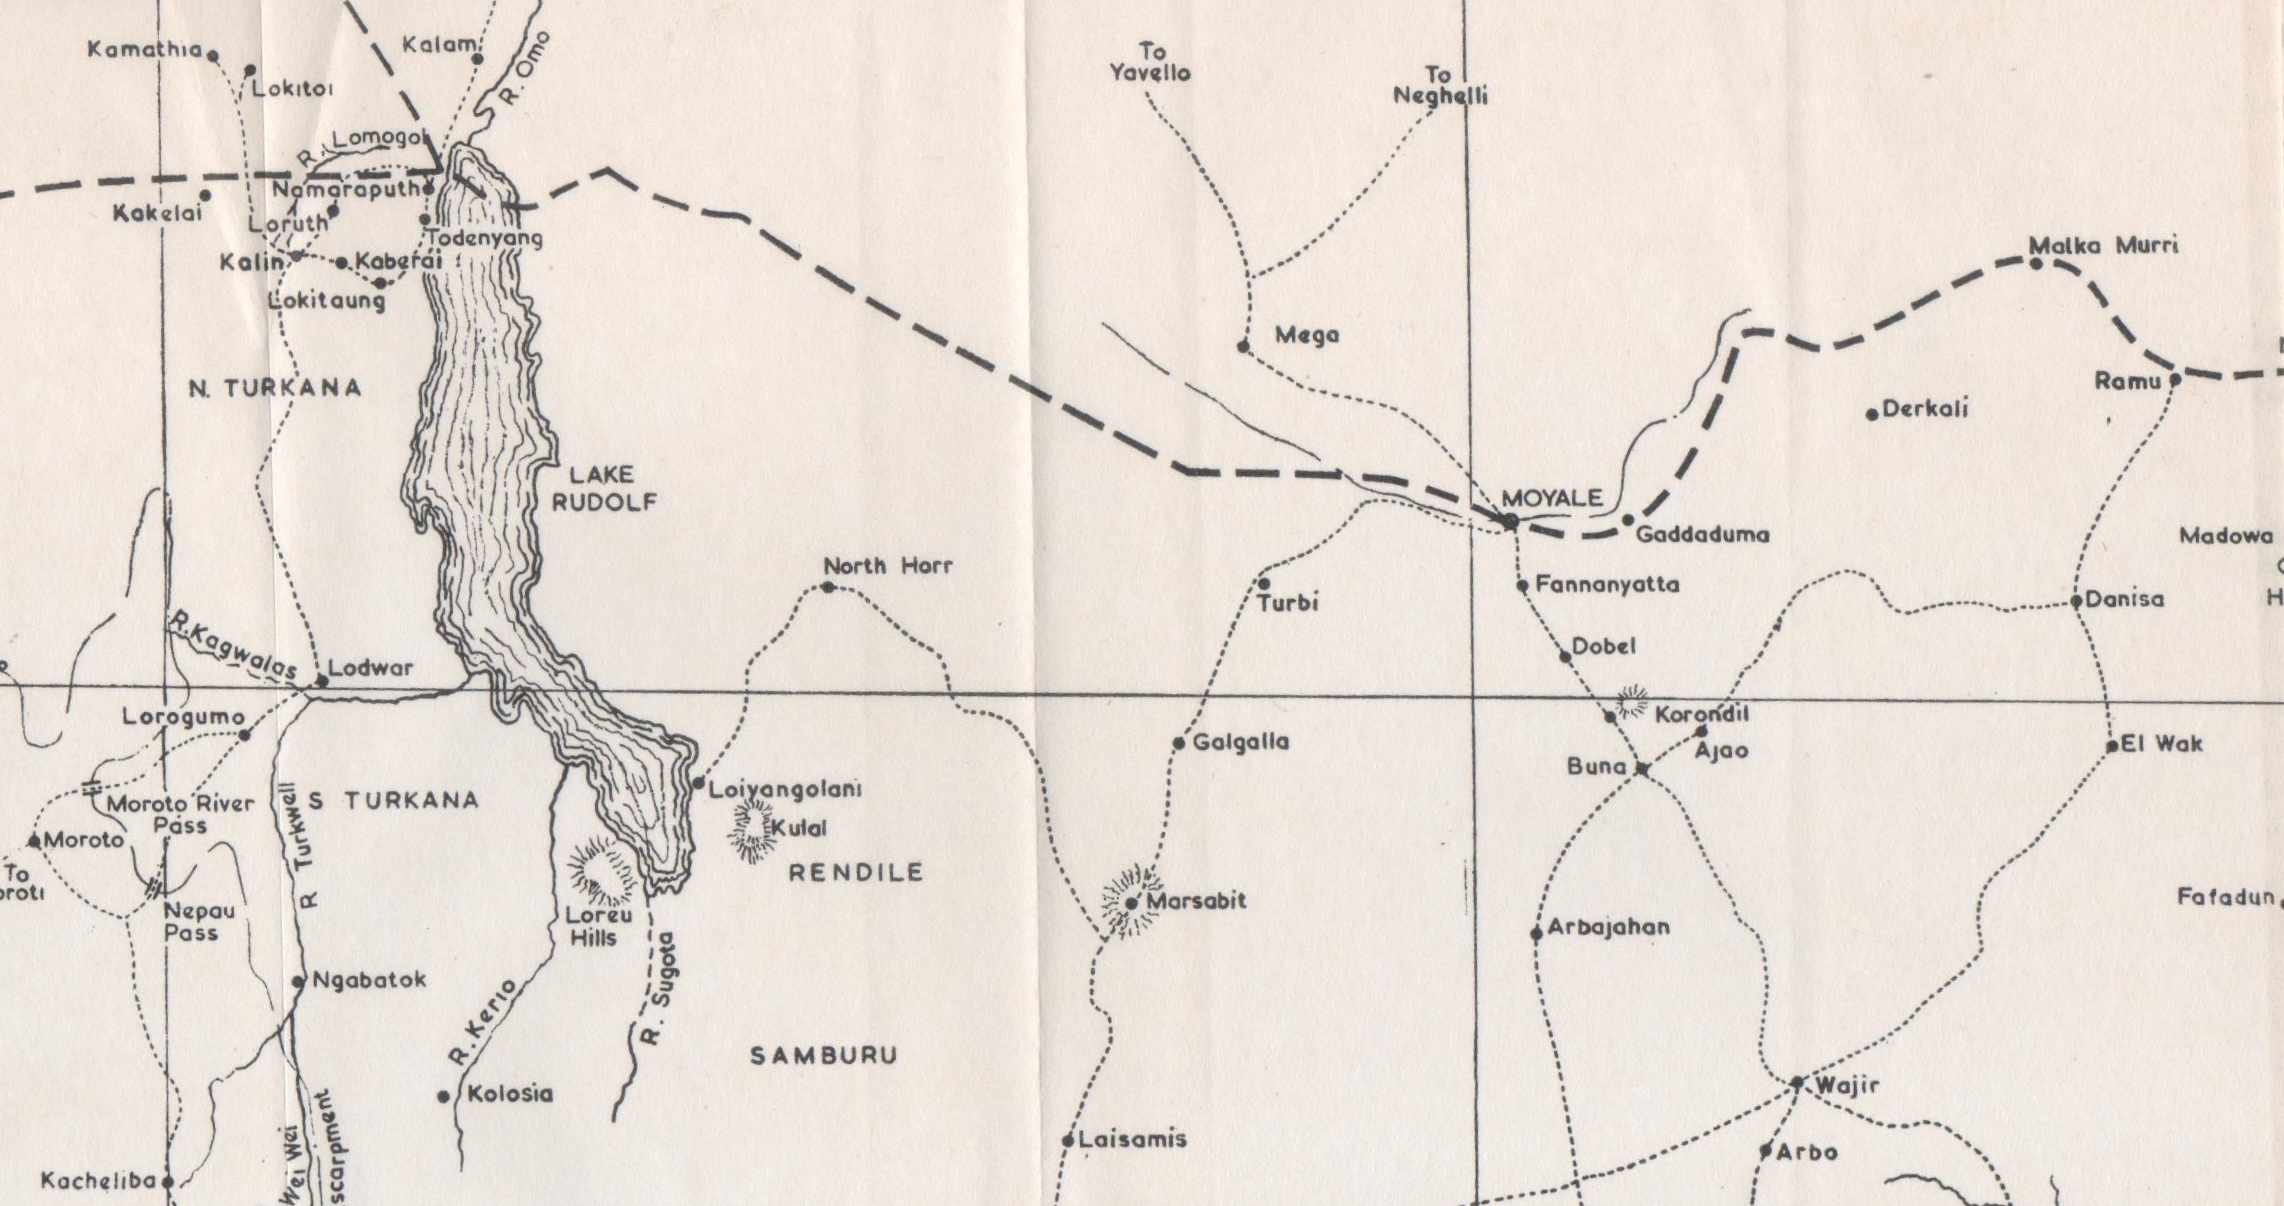
Above: Sketch Map of Northern Frontier District
Attacking
El Wak, 18th June
Brigadier Fowkes ordered an attack on the
Italian positions at El Wak and this operation went ahead on 18th
June under Major J.F. Macnab (Queen’s Own Cameron Highlanders); Macnab’s force
consisted of ‘D’ Company 1 KAR, (Captain J.D.N.C. Henderson, Royal Scots
Fusiliers), ‘A’ Company 5 KAR, a section of medium mortars, a detachment of
Engineers and a troop of the East African Reconnaissance Squadron (EARS). However the operation was beset with problems
due to inexperience in moving through unknown bush at night; Macnab took so
long to move to the objective that a British reconnaissance aircraft that was
scheduled to arrive an hour after the attack in fact arrived before it, causing
the enemy irregulars to scatter. The
British attacked an empty enemy camp and set fire to it after seizing the
Italian flag that was flying; meanwhile the British plane received an enemy
bullet in its radiator and landed nearby where it had to be abandoned and
destroyed. Macnab and his exhausted men
withdrew to a firm base that was held by Henderson and called up their
transport.
However Italian colonial troops began
arriving on the scene and the British had to beat a very hasty retreat. British military honour was saved by No. 11787
L/Cpl Asamu, ‘D’ Coy 1 KAR, who later received a Military Medal with the citation:
On the 18th June 1940
during the raid on El Wak, L/Cpl Asamu, ‘D’ Coy 1st Bn KAR, showed
conspicuous coolness, when under enemy fire he continued to feed and supply his
Bren gun at the cross roads. He remained
in action until all his men were able to reach safety owing to his covering
fire, and then he carried his gun to a Reconnaissance truck. The example that he set was an inspiration to
his section.
The
withdrawal from Moyale, 14th July
From 1st July the Italians
started hostilities against the British fort at Moyale, which was garrisoned by
‘A’ Company 1 KAR (Captain F.C. Drummond, Leicestershire Regiment). Heavy shelling was followed by an infantry
attack that was successfully resisted, and reinforcements under Macnab were
sent to Moyale from Buna; the reinforcing troops included a section of 22
Mountain Battery, Indian Army. The
shelling continued and on 9th July Henderson’s ‘D’ Company moved
into the fort to relieve Drummond’s ‘A’ Company, however Lieutenant Sarel Eloff
Du Toit of ‘A’ Company stayed on in the fort to acquaint Henderson and his men
with the surrounding ground.
On the following day the enemy artillery
caused casualties and No. 11591 Askari Willie, 1 KAR, displayed conspicuous
bravery in action for which he was awarded the Military Medal: During the
bombardment of MOYALE on the 10th July 1940, the section post in
which the Askari was serving received a direct hit from a shell. The section commander with two other soldiers
were killed and four other soldiers wounded, and the remainder of the section
suffered from considerable shock. But
Askari WILLIE took charge of the post, reorganised the defence, and got a light
automatic into action again. His example
and presence of mind in collecting the survivors and detailing them to the
defences was responsible for the successful defence of this post. Through the remainder of the siege he set an
exemplary example of fortitude and leadership.
A further casualty caused by enemy fire
that day was Captain Frederick Cecil Drummond who was mortally wounded in the
head as he took his ‘A’ Company back up the escarpment to the south where the
British water source was being secured.
More British troops were sent to Moyale as reinforcements but on 13th
July the decision was made to evacuate Moyale Fort; supporting troops
manoeuvred but the message ordering Henderson to withdraw never reached him.
Neue Tabelle
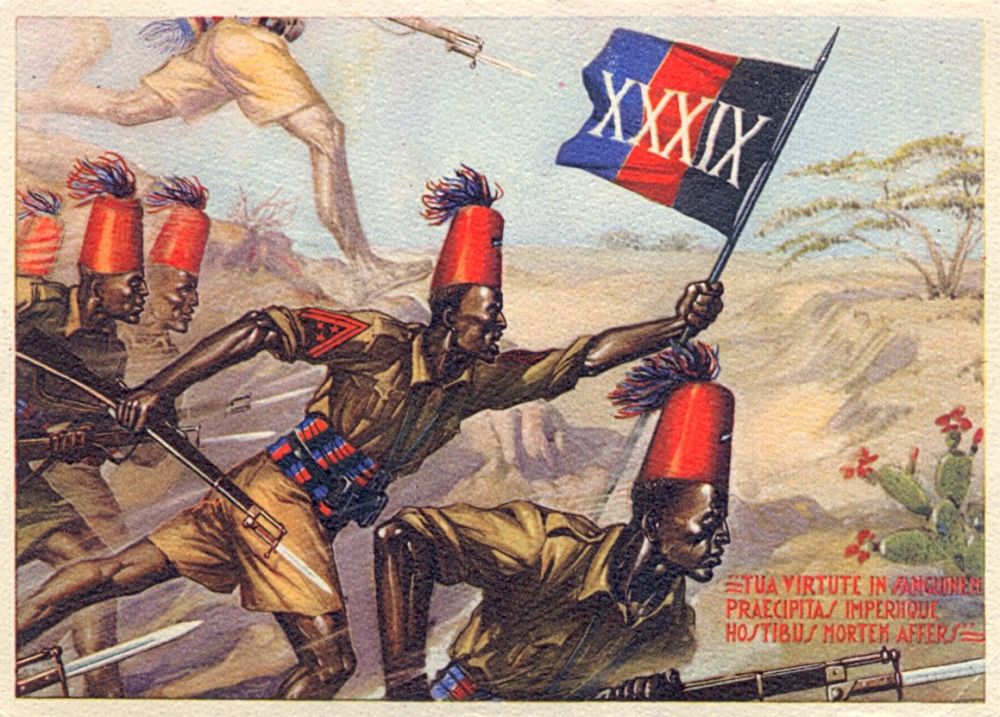
Above: Postcard depicting Italian Colonial Troops
During the following day communication was
re-established and that night, after destroying all stores and removing boots,
the defenders silently moved between Italian positions and withdrew. Sarel Du Toit led the move and for his
conspicuous leadership he received the Military
Cross: Lieutenant DU TOIT was in Moyale from the 24th June until
the withdrawal on the 14th July 1940. During the whole of this time he was most
determined and enterprising on patrol and conspicuous in his efforts to
encourage the African troops in their defence of the post. When on the 9th July his company
was relieved in Moyale he volunteered to remain in the fort to give the
in-coming commander the benefit of his knowledge gained by his frequent patrols
and, when the withdrawal took place on the 14th July, it was he who
led the garrison of some 300 men through the enemy lines to our troops.
Three badly wounded Askari were left in the
fort but one of them later managed to get out and was picked up by an EARS
vehicle. The British commander in the
fort, John David Neil Henderson, also received the Military Cross: For
conspicuous leadership and devotion to duty.
He was in command of the garrison at MOYALE from the 10th
July until the 14th July 1940.
During that period the garrison was completely surrounded and subjected
to continuous bombardment from both the air and from the ground and several
attacks were made on the position.
Captain HENDERSON remained master of the situation and encouraged those
under his command, both European and African to continue the defence although
completely isolated. When on the 13th
July efforts to relieve the Garrison had failed, and arrangements for their
withdrawal had miscarried Captain Henderson did not lose heart and on the night
of the 14th/15th July withdrew the garrison through the
enemy lines and re-joined our own troops five miles from the fort.
Meanwhile No. RB 10134 Lance Corporal Colin
Adrian Alexander Manning of the EARS had been in action, earning a Military Medal: Lance
Corporal Manning was ambushed while on patrol in the leading car on 14th
July 1940. The car came under fire from
two machine guns and from rifles at about 100 yards range. Lance Corporal Manning immediately got his
Bren Gun into action at the side of the road and returned the fire. Then, leaving his gun to be fired by his No.
2 he returned to the car, turned it round on the road, and as the country was
too rocky to move the car off, collected the car crew and brought the car
back. He was under machine gun and rifle
fire at short range during the whole of this time. The car was not armoured in any way.
Turkana
operations
West of Lake Turkana the Italians armed
Merille tribesmen and encouraged them to raid into British territory,
supporting the Merille with both Banda irregulars and regular Colonial
troops. In early July both 1st/6th
KAR and 2nd/4th KAR (Uganda) were in action along with
Abyssinian Irregulars who had been recruited from the refugee camps at Taveta,
Kenya. The Italian post at Namaraputh was
captured on 13th July but the garrison escaped and ambushed the two
platoons of ‘D’ Company 2nd/4th KAR that were involved. Whilst the Ugandans extricated themselves and
the Abyssinian Irregulars crossed into their homeland to raid Italians,1st/6th
KAR attacked enemy troops in British Namaraputh.
The ferocity of the action and its outcome can
be assessed from the citation for a Distinguished
Conduct Medal that was awarded to No. 5567817 Warrant Officer Class II (Company
Sergeant Major) Percy Jones, Wiltshire Regiment attached to 1st/6th
KAR: CSM
P. Jones took command of the left hand forward platoon to assist in the
co-ordination of that platoon with the movement of the centre platoon in the
attack on BRITISH NAMARAPUTH, on the 14th July 1940, when within 300
yards of the enemy the left flank platoon came under very heavy fire from the
enemy. CSM Jones moved forward with the
two light automatic sections of this platoon to within about 250 yards of the
enemy, bringing controlled and well-aimed fire to bear on the enemy position. He himself then proceeded to bomb the enemy
position with rifle grenades. On finding
his bombs falling short of the target, he moved forward with one light
automatic section to within about 150 yards and fired more rifle grenades with
great accuracy, causing heavy casualties amongst the enemy. In order to bring his fire to bear on an
enemy position further to the right front, he advanced yet again and continued
bombing. He then tried to lead his
platoon into the assault, but was held up by heavy fire and was himself
wounded. Unable to stand and finding his
position to be under enemy fire from both flanks he crawled back to his Lewis
Gun sections and carefully organised the Light Automatic fire, sending an
accurate description of enemy movements by runner to Headquarters. He continued to control and co-ordinate the
movements of the left flank until evacuated to RAF. By his determination, personal example and
leadership, he proved to be an inspiring example to the men, and was directly
responsible for the outstanding success of the operation.
In early October the remainder of 2nd/4th
KAR arrived in northern Turkana under the command of Lieutenant Colonel V.K.H.
Channer (Duke of Cornwall’s Light Infantry), but the Italians were to deliver a
vicious setback to the operational activities of the battalion. On 27th November a Turkana scout
came into the Loruth post that was manned by No. 9 Platoon of ‘B’ Company, 2nd/4th
KAR. The scout reported to the post
commander, 2nd Lieutenant J.C.G. Littlehales, that Merille tribesmen
were attacking a routine patrol that had been sent out to the Lomogol
River. Littlehales ordered his British
sergeant to remain in the post with one section whilst the other two sections,
each armed with a Lewis Gun, deployed in two trucks.
On reaching the scene of the action
Littlehales was led into an ambush by the sight of Merille supposedly fleeing
from him. The British Askari jumped from
their transport and fought on foot but they were swiftly outnumbered and surrounded
in the bush where the 25 soldiers, two truck drivers and five Turkana scouts
were all killed. Littlehales, having
been wounded and being the sole British survivor, was about to be killed when
an Italian officer appeared and took him prisoner. Until he was later discovered in a prisoner
of war camp in liberated Italian East Africa it was thought that Littlehales
was dead.
John Crisp Gascoyne Littlehales was awarded
the Military Cross with the
citation: For conspicuous gallantry in action.
At the Lomogol River on 27th November 1940, 2nd
Lieutenant Littlehales, although wounded twice and unable to walk, was
surrounded and outnumbered by 6 to 1. He
fought his patrol until all his men were killed or so seriously wounded they
could use their weapons no longer. He
was finally taken prisoner.
Neue Tabelle
Above: KAR Askari with Italian flag captured at El Wak, 1940
Conclusion
The latter half of 1940 was a challenging
time for the KAR and East African Forces that held the line along the borders
with Italian-controlled territory. Fortunately
the Italians displayed only limited aggression and initiative, and by the end
of 1940 the threat of invasion had receded due to the arrival of substantial
British reinforcements from South and West Africa.
Frederick Cecil Drummond is buried in the
Commonwealth War Graves Commission War Cemetery on Ngong Road, Nairobi, and the
dead Askari are commemorated on the East Africa Memorial that is located inside
that cemetery.
SOURCES: ·
Carnelly, M.D. The History of the Kenya Armoured Car
Regiment during the Abyssinian Campaign 1939-1941. (Private publication). ·
Dower, Kenneth
Gandar. Abyssinian Patchwork. An Anthology.
(Frederick Muller Ltd, London 1949). ·
East Africa Command
(producer). The Infantry of the East Africa Command 1890-1944. (East African
Standard Ltd, Nairobi 1944). ·
Moyse-Bartlett, Lieutenant
Colonel H. The King’s African Rifles. (Naval & Military Press reprint). ·
Playfair, Major-General
I.S.O. History of the Second World War. The Mediterranean and Middle
East. Volume I. The Early Successes
against Italy (to May 1941). (Naval
& Military Press reprint). ·
Rosenthal, Eric. The
Fall of Italian East Africa.
(Hutchison & Co, London 1942). ·
Sutherland, Jon and
Canwell, Diane. Air War East Africa 1940-1941.
(Pen & Sword Aviation 2009). ·
The National
Archives. Citations under WO 373. ·
Commonwealth War Graves
Commission on-line records.

 Neue Tabelle
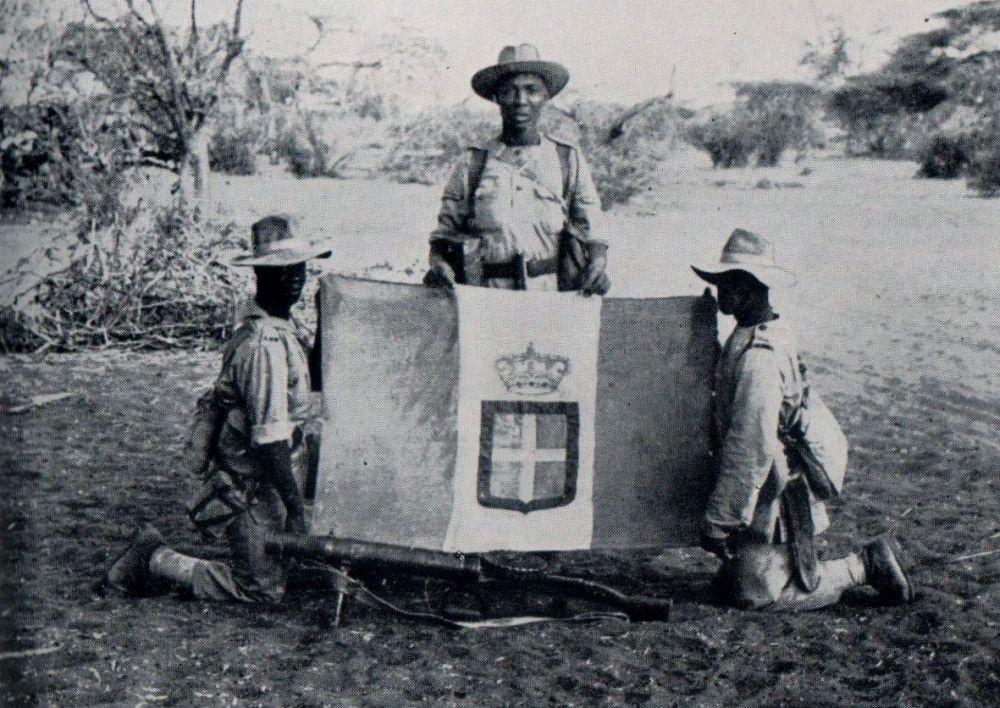 Neue Tabelle